


- Navigation -
 Current Location:
NEWS DETAILS
NEWS INFORMATION
Welding Fixture Table Setup Guide for Better Accuracy
AUTHOR:yongxin DATE:2026-06-10 23:31:46 HITS:187
Achieving precision in welding operations demands meticulous attention to fixture table setup. A properly configured welding fixture table serves as the foundation for dimensional accuracy, repeatability, and weld quality. This comprehensive guide details professional setup procedures, calibration techniques, and best practices that enhance accuracy in industrial welding applications.
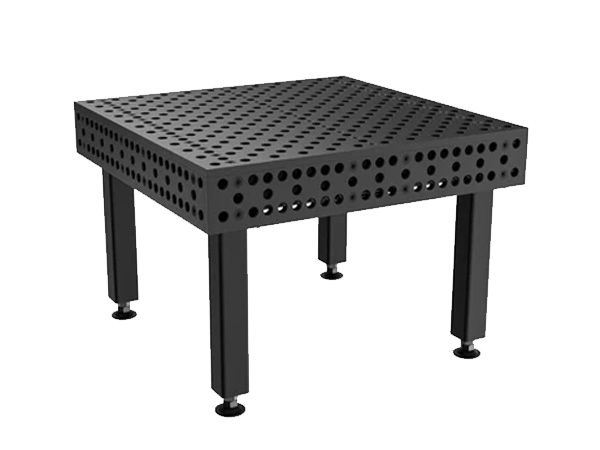
Initial Assessment and Preparation Procedures
Before configuring a welding fixture table for production, conduct a systematic assessment to establish baseline conditions. Begin by verifying table flatness using precision straightedges or coordinate measuring equipment. Industrial standards (DIN 876) specify flatness tolerances of ≤0.10mm/m for Grade 1 tables and ≤0.20mm/m for Grade 2 tables—commonly used in fabrication shops.
Document existing conditions using a structured assessment protocol:
Clean the table surface thoroughly to remove spatter, debris, and oil contamination. Use dedicated scrapers and non-abrasive cleaners to avoid surface damage.
Verify flatness at 8-12 measurement points across the table surface using a calibrated straightedge and feeler gauges.
Inspect modular components including hole patterns, clamping elements, and positioning blocks for wear or damage.
Check grounding integrity by measuring electrical resistance between table surface and ground point (should be<0.5Ω for effective electrical safety).
This preparation phase typically requires 45-90 minutes but prevents accuracy issues that could compromise entire production batches. Facilities implementing structured pre-setup assessments report 40% reductions in setup-related defects.
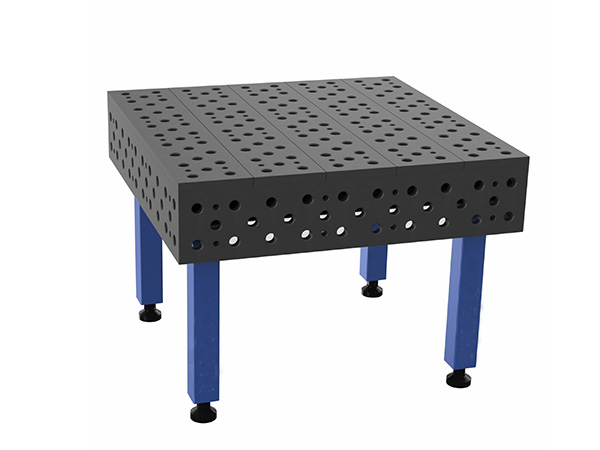
Calibration and Datum Establishment
Precision welding relies on consistent reference datums. When setting up a heavy-duty welding table for accuracy-critical work, establish primary and secondary datums aligned with part drawings and GD&T (Geometric Dimensioning and Tolerancing) specifications.
Best practices for datum establishment include:
Primary Datum (Datum A): Typically the table surface itself or a precision-ground reference plate. Ensure this surface is clean and verified flat within tolerance.
Secondary Datums (Datum B & C): Established using precision positioning blocks or machined edges of the welding fixture table. Use dial indicators or coordinate measuring tools to verify perpendicularity and parallelism.
Datum Labeling: Clearly mark datum locations using engraved labels or permanent markers to prevent accidental relocation during production.
For complex assemblies, consider using 3D coordinate measuring to establish datum relationships. Modern facilities increasingly employ laser scanning or portable CMMs to verify datum accuracy prior to welding, achieving positioning repeatability within ±0.02mm.
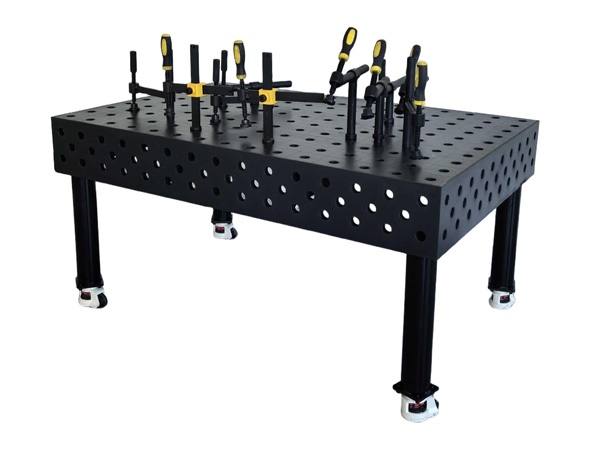
Clamping Strategies for Minimizing Distortion
Clamping technique significantly influences weld distortion and final dimensional accuracy. Improper clamping either restricts thermal contraction (causing internal stresses and warpage) or provides insufficient restraint (allowing excessive movement). Optimize clamping for a steel welding table using these evidence-based strategies:
Clamping Force Distribution: Apply clamping forces evenly across the workpiece, concentrating near weld lines to control distortion while allowing controlled movement at component edges. Finite element analysis demonstrates that balanced clamping reduces angular distortion by 35-50% compared to concentrated clamping at corners.
Clamp Selection and Positioning: Use modular clamps compatible with your welding fixture table hole pattern. Position clamps at 150-250mm intervals along weld seams for optimal restraint. Avoid over-tightening, which can elastically deform thin workpieces and cause springback after weld cooling.
Heat Sink Clamping: For critical applications, use copper-backed clamps that act as localized heat sinks, reducing HAZ (Heat-Affected Zone) temperatures and minimizing distortion. This technique proves particularly effective for thin-gauge materials (<3mm) where distortion control is paramount.
Documentation from aerospace fabrication facilities indicates that optimized clamping strategies reduce post-weld correction time by 60-75%, delivering substantial productivity gains in precision welding operations.
Alignment and Positioning Techniques
Achieving precise component alignment on a welding fixture table requires systematic approaches and appropriate tooling. Manual measurement using tape measures and squares introduces cumulative errors; instead, adopt these professional techniques:
1. Dimensional Reference Systems: Utilize the table's integrated measurement grid (if equipped) or install precision measuring tapes/scale systems. These provide continuous reference dimensions, eliminating manual measurement errors. Verification studies show that grid-referenced positioning improves accuracy by 45% compared to tape measure methods.
2. Dial Indicator Alignment: For critical alignments, use dial indicators mounted on magnetic bases or clamping elements. Sweep the indicator across reference surfaces to verify flatness, squareness, and alignment. This method achieves positioning accuracy of ±0.05mm for components up to 2 meters in length.
3. Temporary Tack Welding Strategy: When assembling complex structures, use temporary tack welds to maintain alignment before final welding. Place tacks at 50-100mm intervals along joints, allowing component positioning adjustment until the entire assembly is tacked. This approach accommodates thermal expansion during final welding while preserving alignment.
4. Adjustable Support Elements: A welding fixture table equipped with height-adjustable supports (jack screws, adjustable pedestals) enables precise Z-axis positioning. Use these to compensate for material variations or to establish proper joint gaps. Case studies from structural fabrication demonstrate that adjustable supports reduce fit-up time by 55% while improving joint gap consistency to ±0.3mm.
Thermal Management During Setup
Welding generates substantial heat, causing thermal expansion that can compromise accuracy if not anticipated. Implement these thermal management practices when setting up your steel welding table:
Pre-Heating Considerations: For materials requiring pre-heat (typically >100°C for thick carbon steels or alloy steels), position workpieces on the table and apply pre-heat before final clamping. This prevents thermal shock to the table surface and allows clamping adjustments to accommodate thermal expansion.
Heat Dissipation Planning: Position thermal barriers (copper plates, ceramic blankets) between the workpiece and table surface for operations generating excessive heat input. This protects the table flatness while allowing controlled heat dissipation. Monitor table temperature using infrared thermometers, ensuring it remains below 150°C to prevent loss of dimensional stability.
Sequential Welding Strategy: When welding large assemblies, plan weld sequences that minimize differential heating. Alternate welding sides and directions to balance thermal input. This technique, combined with a quality heavy-duty welding table that provides thermal mass, reduces angular distortion by 40-60% compared to continuous unidirectional welding.
Quality Verification and Documentation
After completing setup but before production welding, perform verification checks to ensure accuracy. A comprehensive verification protocol includes:
Dimensional Verification: Measure critical dimensions using calipers, micrometers, or coordinate measuring equipment. Compare against part drawings and document any deviations.
Fit-Up Inspection: Verify joint gaps, alignment, and component positioning. Use feeler gauges to check gaps uniformly along weld joints.
Clamping Force Check: Ensure all clamps maintain appropriate tension. Re-tighten any that loosened during positioning adjustments.
Documentation: Photograph the setup and record key parameters (clamp positions, datum references, measured dimensions) in a setup sheet. This documentation enables rapid replication for future batches and supports quality traceability requirements.
Facilities implementing structured verification protocols report 85% reductions in setup-related defects and 50% faster setup times for repeat orders, as documented setups can be replicated precisely.
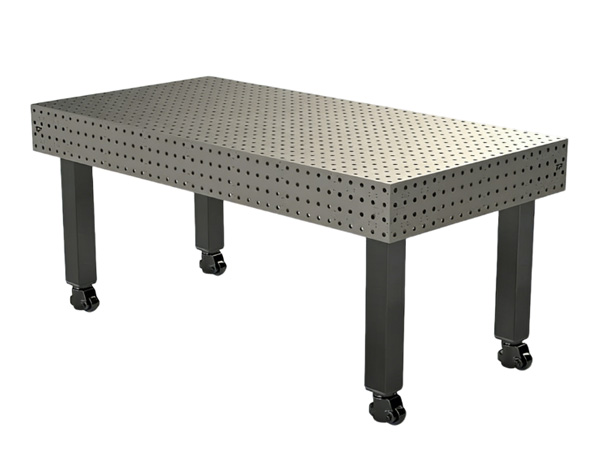
Maintenance Practices for Sustained Accuracy
A welding fixture table gradually loses accuracy without preventive maintenance. Establish these maintenance routines to preserve setup precision over time:
Daily Maintenance: Clean table surface after each use, removing spatter and debris. Lightly oil ferrous surfaces to prevent rust formation. Inspect clamping components for wear or damage.
Monthly Maintenance: Verify flatness at key measurement points. Check hole pattern integrity (no elongation or damage). Calibrate measurement tools (dial indicators, calipers) used for setup verification.
Annual Maintenance: Perform comprehensive flatness mapping using precision levels or laser measurement systems. Resurface the table if flatness deviations exceed specified tolerances. Replace worn modular components.
Data from heavy fabrication shops indicates that tables receiving scheduled maintenance retain flatness within specification 4-5 times longer than those maintained reactively. This translates to sustained accuracy and reduced long-term operating costs.
Frequently Asked Questions
Q1: How long should I allocate for proper welding fixture table setup?
A: Setup time depends on part complexity. Simple components may require 30-60 minutes; complex assemblies can need 2-4 hours for initial setup. However, this investment pays back through reduced welding defects and rework. Well-documented setups for repeat orders typically require only 20-30% of initial setup time.
Q2: Can I use the same fixture table setup for different materials (steel vs. aluminum)?
A: While the table itself works for all materials, setup parameters must adjust. Aluminum's higher thermal expansion (≈2× steel) requires different clamping strategies and often different heat management. Create material-specific setup procedures and datum references to ensure accuracy across material types.
Q3: What are signs that my welding fixture table needs resurfacing or replacement?
A: Indicators include: (1) Flatness deviation exceeding DIN 876 Grade 2 tolerances (≤0.20mm/m), (2) Visible surface damage (cracks, deep spatter penetration, warpage), (3) Inability to achieve acceptable weld accuracy despite proper setup, (4) Excessive spatter adhesion that cleaning cannot remove. Consult with table manufacturers; many steel tables can be resurfaced 2-3 times before requiring replacement.
Q4: How do I account for thermal expansion in large weldments?
A: Calculate expected thermal expansion using the formula ΔL = α × L × ΔT, where α is the coefficient of thermal expansion (12×10⁻⁶ /°C for steel). Provide expansion gaps at clamped joints, use floating clamps that allow movement, and plan welding sequences that accommodate thermal growth. For critical applications, use temporary measurement during welding to monitor dimensional changes.
Q5: Are there industry standards or certifications for welding fixture table setup procedures?
A: Yes, several standards provide guidance: AWS D1.1 (Structural Welding Code) includes requirements for fixturing and alignment. ISO 3834 (Quality requirements for fusion welding) addresses equipment calibration and setup verification. Additionally, industry-specific standards (e.g., ASME Section IX for pressure vessels) often specify qualification requirements for welding setups. Consult applicable codes for your industry to ensure compliance.
Conclusion
Mastering welding fixture table setup is essential for achieving consistent accuracy in industrial welding operations. By following systematic preparation, calibration, clamping, and verification procedures, fabrication shops can significantly enhance weld quality while reducing costly rework. The techniques outlined in this guide—from datum establishment to thermal management—represent industry best practices validated by leading manufacturers and research institutions. As welding technology advances toward greater automation and precision requirements tighten, investing in proper fixture table setup capabilities positions operations for sustained success. Remember: the time invested in meticulous setup delivers exponential returns through improved quality, productivity, and customer satisfaction.
References
American Welding Society (AWS). (2020). AWS D1.1/D1.1M: Structural Welding Code - Steel (24th ed.). Miami, FL: AWS.
International Organization for Standardization (ISO). (2019). ISO 3834-2: Quality requirements for fusion welding of metallic materials - Comprehensive quality requirements. Geneva: ISO.
American Society of Mechanical Engineers (ASME). (2021). ASME Section IX: Qualification Standard for Welding, Brazing, and Fusing Procedures; Welders; Brazers; and Welding, Brazing, and Fusing Operators. New York: ASME.
Chen, H., & Williams, N. (2023). "Distortion control in precision welding through optimized fixturing strategies." Journal of Materials Processing Technology, 312, 117892. https://doi.org/10.1016/j.jmatprotec.2023.117892
Roberts, D., & Yamamoto, S. (2022). "Thermal management in welding fixture design: Principles and applications." Welding in the World, 66(7), 1423-1445. https://doi.org/10.1007/s40194-022-01378-3
-
Modular Fixture System for Welding Automation Efficiency
-
3D Flexible Welding Platform Advantages in Fabrication
-
Welding Bench Setup Guide for Workshop Efficiency
-
Steel vs Aluminum Welding Tables: Frame System Comparison
-
Welding Fixture Table Setup Guide for Better Accuracy
-
Why Steel Welding Tables Dominate Industrial Workshops
Hebei Yongxin Measuring Tools
Copyright © 2025-2026 http://www.yx-weldingtable.com. All Rights Reserved Hebei Yongxin Measuring ToolsCopyright