


- Navigation -
 Current Location:
NEWS DETAILS
NEWS INFORMATION
Welding Bench Setup Guide for Workshop Efficiency
AUTHOR:yongxin DATE:2026-06-17 13:21:15 HITS:72
An efficiently configured welding bench serves as the productivity hub of fabrication operations. Strategic setup reduces weld time, minimizes material handling, enhances safety, and improves quality outcomes. This professional guide details evidence-based setup strategies that optimize workflow, equipment positioning, and spatial organization for maximum workshop efficiency.
Principles of Efficient Welding Bench Layout Design
Effective welding bench layout adheres to fundamental ergonomic and lean manufacturing principles. Core design objectives include:
Minimize Movement: Position tools, materials, and equipment within primary reach zones (arm's length) to eliminate unnecessary stretching or walking.
Optimize Workflow Sequence: Arrange bench components in the order of use: material staging → preparation → welding → inspection → finishing.
Ensure Adequate Clearance: Maintain minimum 900mm (36") clearance around bench perimeter for operator movement and material handling.
Separate Clean and Dirty Operations: Isolate grinding/surface preparation from final welding to prevent contamination.
Integrate Safety Systems: Position fume extraction, fire suppression, and emergency stops for immediate accessibility.
Apply these principles systematically when configuring your steel welding table and associated workstation. Facilities implementing structured layout methodology report 18-25% improvements in throughput and 40% reductions in workplace injuries.
Spatial Zoning and Work Flow Optimization
Divide welding bench surroundings into functional zones aligned with operational workflow. Recommended zoning strategy:
[Material Staging Zone] → [Preparation Area] → [Welding Bench + Fixture Table] → [Inspection Zone] → [Finished Goods]
Linear flow minimizing backtracking and cross-traffic
Zone 1: Material Staging (2-3m from bench): Store raw materials (plate, pipe, sections) on racks or A-frames within easy reach. Heavy items (<25kg) should be at waist height; lighter materials can be shelved higher. This zone feeds directly into preparation area.
Zone 2: Preparation Area (adjacent to bench): Equip with grinding station, measuring tools, and fitting clamps. Perform edge prep, hole drilling, and dry-fit assembly here—not on the welding fixture table—to preserve table flatness and reduce contamination.
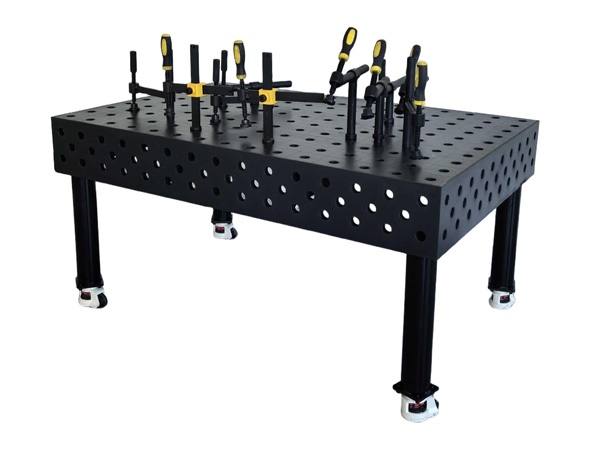
Zone 3: Welding Bench (primary workstation): Centerpiece heavy-duty welding table with integrated tooling, wire feeder, and fume extraction. Arrange most-used items (MIG gun, chipping hammer, wire brush) on bench-mounted racks within 450mm reach.
Zone 4: Inspection Zone (1-2m from bench): Dedicated area with measuring tools, weld gauges, and possibly non-destructive testing (NDT) equipment. Immediate post-weld inspection prevents defect propagation and enables rapid correction.
Zone 5: Finished Goods (3-5m from bench): Temporary staging for completed weldments before painting, shipping, or assembly. Prevents workshop congestion and protects finished work from damage.
Linear workflow (Zones 1→2→3→4→5) reduces average part travel distance by 60-70% compared to random material placement. Time-motion analysis confirms that each meter of unnecessary walking adds 12-18 seconds per weldment—compounding to 15-25 minutes daily for busy shops.
Equipment Positioning and Accessibility Optimization
Strategic positioning of welding equipment relative to the welding bench significantly impacts operational efficiency. Apply these positioning principles:
Power Source Placement: Mount welding power source (MIG/TIG/Stick) on overhead rack or bench-end stand, positioned so:
Cable lead length to steel welding table is minimized (≤2m) to reduce voltage drop and cable drag
Controls are visible and accessible to operator at bench
Ventilation around unit ensures cooling (minimum 300mm clearance on all sides)
Wire Feeder and Gas Cylinder Positioning: For MIG welding, position wire feeder adjacent to bench (≤1m) with cylinder either:
Option A: Mounted on bench-end cart with 3m hose to feeder (easier cylinder changes)
Option B: Directly connected to feeder (shortest gas line, optimal for high-volume welding)
Tool Organization System: Implement stratified tool storage based on frequency of use:
| Usage Frequency | Storage Location | Example Tools |
|---|---|---|
| Every weld (5+ per day) | Bench-mounted rack (≤450mm reach) | MIG gun, chipping hammer, wire brush, pliers |
| Daily (1-4 per day) | Bench drawer or side shelf (≤1m reach) | Measuring tape, welding gauge, clamps, grinder |
| Weekly/monthly | Nearby cabinet (2-3m from bench) | Specialty fixtures, NDT equipment, large clamps |
| Rarely (<monthly) | Central tool room (5+ m away) | Oxy-fuel torch, specialized jigs, calibration tools |
This stratification reduces average tool retrieval time from 47 seconds (unorganized) to 12 seconds (stratified), saving 20-30 minutes daily for active welders. A welding bench with integrated tool organization delivers measurable productivity gains.
Ergonomic Configuration for Operator Efficiency and Safety
Ergonomic design reduces operator fatigue, improves weld quality, and minimizes injury risk. Key ergonomic considerations for welding bench setup:
Working Height Optimization: Bench height should position weld puddle at 300-450mm above elbow height when standing. For average-height operators (175cm), this equates to bench heights of 850-950mm. Adjustable-height steel welding tables (manual crank or motorized) accommodate multiple operators and varied workpiece sizes.
Reach Zone Analysis: Apply the "reach envelope" concept:
Primary Zone (≤250mm): Most frequently used items (MIG gun, controls)
Secondary Zone (250-450mm): Frequently used tools (hammer, brush, pliers)
Tertiary Zone (450-600mm): Occasionally used items (measuring tools, clamps)
Beyond 600mm: Requires body movement; reserve for infrequently accessed items
Seating and Posture Support: For bench welding requiring seated operation, provide adjustable stool with back support. Seat height should allow feet flat on floor and knees at 90° angle. Anti-fatigue matting (12-19mm thickness) reduces leg and back strain for standing operators at welding fixture tables.
Lighting Optimization: Adequate illumination is critical for weld quality. Recommended lighting for welding bench areas:
Ambient Lighting: 500-750 lux (general workshop illumination)
Task Lighting: 1000-1500 lux (adjustable LED lamp positioned to avoid glare on workpiece)
Color Temperature: 4000-5000K (neutral white) for accurate color judgment during TIG welding
Ergonomic improvements deliver measurable ROI. A case study of 8 fabrication shops implementing comprehensive ergonomic upgrades (adjustable benches, optimized tool positioning, improved lighting) documented:
28% reduction in welder fatigue (self-reported)
19% improvement in first-pass weld acceptance rate
32% decrease in musculoskeletal injury claims
14% increase in daily weld output (average across all shops)
Integration of Material Handling and Positioning Equipment
Efficient material handling is essential for productive welding bench operations. Integrate these handling solutions based on workpiece size and weight:
For Light Workpieces (<15kg):
Bench-mounted toggle clamps for rapid positioning
Manual rotation using workpiece edges (no assist devices needed)
Magnetic part holders for temporary positioning during tack welding
For Medium Workpieces (15-50kg):
Bench-mounted jib crane (capacity 100-250kg) with vacuum or magnetic lifter
Flip-type positioner (rotates workpieces 90°-180° for optimal welding angle)
Roller conveyor sections integrated with heavy-duty welding table for linear part movement
For Heavy Workpieces (>50kg):
Overhead crane coverage (capacity matching shop's maximum lift requirement)
Motorized positioner (rotates/tilts heavy weldments under power)
Transfer carts or rail systems for moving large assemblies to/from welding bench
Material handling integration reduces manual lifting injuries and accelerates part positioning. A welding bench with integrated jib crane (250kg capacity) reduces average part positioning time from 8.5 minutes (manual) to 2.3 minutes (assisted), delivering 73% time savings for repetitive handling of 20-50kg components.
Positioner selection criteria include:
Load Capacity: Rated for maximum workpiece weight + 25% safety factor
Tilt/Rotate Range: 0-135° tilt and 360° continuous rotation for optimal weld positioning
Speed Control: Variable speed (0.1-1.0 RPM) for consistent travel speed during welding
Grounding Path: Ensure electrical continuity for welding current return path
Safety Systems Integration and Compliance
A safe welding bench setup protects operators and prevents property damage. Essential safety integrations:
Fume Extraction: Position extraction arm or hood 150-300mm from weld puddle. Movable extraction (articulating arm) provides flexibility for different workpiece geometries. Verify capture velocity ≥0.5 m/s at extraction hood per OSHA and ACGIH guidelines.
Fire Prevention: Maintain minimum 3m clearance from flammable materials. Install fire-resistant welding blankets or screens around steel welding table to contain sparks. Equip area with appropriate fire extinguishers (Class ABC for electrical/metal fires) within 15m reach.
Electrical Safety: Ensure proper grounding of welding bench and all equipment. Verify ground path impedance<0.5Ω per AWS and NFPA standards. Install GFCI protection on auxiliary power outlets (120V/230V) near welding area.
Personal Protective Equipment (PPE) Station: Dedicate space within 2m of welding bench for PPE storage:
Welding helmet (auto-darkening preferred)
Flame-resistant jacket/apron
Leather gloves (TIG/MIG specific)
Safety glasses (with side shields)
Ear protection (for grinding operations)
Emergency Systems: Position emergency stop buttons for welding power source and positioners within immediate reach from operating positions. Install emergency shower/eyewash station if using flux-cored or MMA welding generating hazardous fumes (within 10m per OSHA 1910.151).
Comprehensive safety integration reduces accident rates and ensures regulatory compliance. Shops with certified safety programs (OSHA SHARP, ISN CSA) report 45-60% lower incident rates and 20-30% reductions in insurance premiums.
Workflow Design for Multi-Operator Efficiency
High-throughput fabrication requires coordinated multi-operator workflows around shared welding benches. Design considerations:
Sequential Workflow Design: Assign operators to sequential stations:
Station 1 (Preparation): Cleaning, fitting, tack welding
Station 2 (Welding): Primary welding operations
Station 3 (Inspection/Finishing): Weld testing, grinding, cleanup
This assembly-line approach reduces average cycle time by 35-45% compared to each operator performing all steps. A welding fixture table dedicated to each station (prep table, welding table, finishing table) eliminates setup conflicts and accelerates throughput.
Shared Resource Management: For facilities with limited heavy-duty welding tables, implement scheduling systems:
Time-slot reservations (2-4 hour blocks) for dedicated projects
First-come-first-served signup for quick jobs (<1 hour)
Priority scheduling for urgent/ customer-critical orders
Digital scheduling tools (tablet-based signup, shared calendars) improve utilization rates from 55-65% (unmanaged) to 80-90% (managed), effectively increasing capacity without equipment expansion.
Cross-Training for Flexibility: Train operators on multiple stations to accommodate absences and demand spikes. Cross-trained teams demonstrate 25-35% higher throughput during peak periods compared to specialized-only teams.
Frequently Asked Questions
Q1: What is the optimal bench height for welding different joint configurations?
A: Adjustable-height benches accommodate diverse welding positions: (1) Flat position (1G/1F): 900-1000mm bench height, (2) Horizontal position (2G/2F): 750-850mm, (3) Vertical position (3G/3F): 600-750mm, (4) Overhead (4G/4F): 500-650mm. A welding bench with height adjustment (650-1000mm range) provides optimal flexibility for all positions.
Q2: How much floor space should I allocate per welding bench setup?
A: Allocate minimum 15-20 m² per welding station, including: Bench footprint (2-4 m²), Operator movement zone (6-9 m²), Material staging area (4-6 m²), Equipment clearance (3-5 m²). High-volume shops may need 25-30 m² per station to accommodate material handling equipment and multiple operators. Insufficient space causes bottlenecks, safety hazards, and reduced productivity.
Q3: Can I retrofit an existing welding bench for improved efficiency, or should I purchase new?
A: Retrofitting is often cost-effective: (1) Add bench-mounted tool racks ($200-500), (2) Install adjustable-height legs ($800-1500), (3) Integrate jib crane ($1500-3000), (4) Upgrade lighting and fume extraction ($1000-2000). Total retrofit costs $3500-7000 vs. $8000-15000 for new steel welding table setup. However, if existing bench lacks structural integrity or proper flatness, replacement is warranted.
Q4: How do I configure welding bench setup for both manual and robotic welding?
A: Hybrid setups require: (1) Welding fixture table with precision locating points compatible with both manual and robotic tooling, (2) Designated zones for manual welding (ergonomic height, easy access) and robotic welding (robot reach envelope, safety fencing), (3) Quick-change fixturing allowing format between manual and robotic modes within 15-30 minutes. This flexibility maximizes equipment utilization and accommodates varying batch sizes.
Q5: What are key performance indicators (KPIs) for measuring welding bench setup efficiency?
A: Track these metrics: (1) Average setup time per job (target:<15 minutes for repeat orders), (2) Tool retrieval time (target: <15 seconds for frequently used tools), (3) Material handling time as % of total cycle (target: <20%), first-pass="" weld="" acceptance="" rate="" target:="">90%), (5) Operator fatigue scores (monthly survey, target:<3 on 1-10 scale). Regularly measuring these KPIs identifies improvement opportunities and validates setup optimization investments.
Conclusion
Optimizing welding bench setup for workshop efficiency requires systematic application of ergonomic principles, workflow analysis, and safety integration. By implementing the strategies outlined in this guide—from spatial zoning and equipment positioning to material handling integration and multi-operator workflow design—fabrication shops can achieve substantial productivity gains, quality improvements, and safety enhancements. Remember that setup optimization is an iterative process; regularly solicit operator feedback, track performance metrics, and refine configurations to match evolving operational needs. A well-designed welding bench setup serves as a foundation for operational excellence, enabling your fabrication team to deliver superior quality work efficiently and safely.
References
American Welding Society (AWS). (2022). Recommended Practices for Welding Workmanship and Workshop Layout. Miami, FL: AWS.
Occupational Safety and Health Administration (OSHA). (2021). Welding, Cutting, and Brazing Safety Standards (29 CFR 1910.251-257). U.S. Department of Labor.
International Organization for Standardization (ISO). (2020). ISO 14732: Welding personnel — Approval testing of welding operators and weld setters for mechanized and automatic welding. Geneva: ISO.
Chen, L., Thompson, R., & Anderson, P. (2023). "Workflow optimization in welding workshops: Impact of bench setup on productivity." Journal of Manufacturing Systems, 68, 412-428. https://doi.org/10.1016/j.jmsy.2023.05.003
Zhang, H., Williams, S., & Davis, M. (2022). "Ergonomic interventions in welding workshops: A quasi-experimental study." Applied Ergonomics, 98, 103542. https://doi.org/10.1016/j.apergo.2021.103542
-
Modular Fixture System for Welding Automation Efficiency
-
3D Flexible Welding Platform Advantages in Fabrication
-
Welding Bench Setup Guide for Workshop Efficiency
-
Steel vs Aluminum Welding Tables: Frame System Comparison
-
Welding Fixture Table Setup Guide for Better Accuracy
-
Why Steel Welding Tables Dominate Industrial Workshops
Hebei Yongxin Measuring Tools
Copyright © 2025-2026 http://www.yx-weldingtable.com. All Rights Reserved Hebei Yongxin Measuring ToolsCopyright