


- Navigation -
 Current Location:
NEWS DETAILS
NEWS INFORMATION
How to Assemble a 3D Welding Platform?
AUTHOR:yongxin DATE:2026-02-22 15:20:21 HITS:96
How to Assemble a 3D Welding Platform?
The core of assembling a 3D welding platform is to first fix the base platform and level it,then use locating pins and bolts to splice and expand it,and finally assemble the tooling fixtures according to the workpiece,ensuring the platform is flat and the positioning accuracy is maintained throughout the process.
I.Preliminary Preparation(Site+Tools+Inspection)
Site Requirements:Choose a flat,firm,vibration-free surface,leaving 1.5–2m of operating space around it,away from vibration sources.
The ground can be a concrete foundation with pre-embedded feet(for heavy-duty platforms),or directly using adjustable brackets/shims(for light-duty platforms).
Tools and Accessories:
Lifting:Crane/forklift,nylon slings,hand-operated hoist(to prevent platform scratches).
Leveling:Frame/electronic level,feeler gauge,height gauge,angle gauge.
Tightening:Locating pins(D16/D28),T-bolts,nuts,torque wrench.
Cleaning:Brush,compressed air,rust-preventive oil.
Platform and Accessory Inspection
Inspect the platform surface:No deformation,no bumps,holes/slots are clear,no iron filings or oil stains.
Check accessories:Positioning pins,support blocks,clamps,quick clamps,etc.are complete and in good condition.
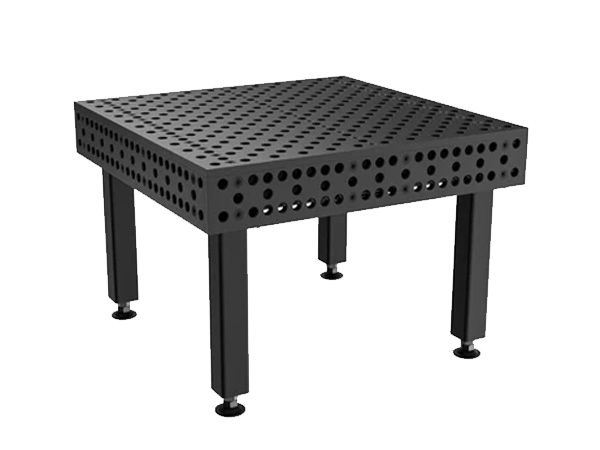
II.Basic Platform Installation(Single/Multiple Panel Assembly)
1.Single Platform Positioning and Leveling(Bracket/Shim Method)
Bracket Installation:Smoothly hoist the platform onto the bracket,use the leveling feet at the bottom of the bracket to roughly level it;then use the support bolts between the bracket and the platform for fine adjustment.
Shim/Anchor Installation:Evenly place shims at the bottom(≤3 pieces per group),aligning them with the anchor holes;use a level to measure the longitudinal/transverse/diagonal lines,and fine-tune the shims to achieve the required levelness(Grade 1≤0.04mm/m).
Fixing:Insert the anchor bolts,tightening diagonally in stages(to prevent deformation);if grouting is required,use non-shrink grout and cure.
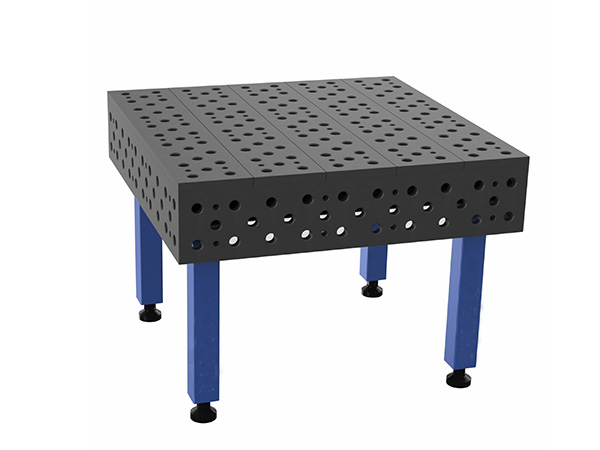
2.Multi-Platform Assembly(Expanding into a Larger Tabletop)
Positioning and Assembly:Place two platforms close together,inserting special positioning pins into the mating holes to ensure uniform gaps and coplanarity.
Bolt Tightening:Tighten T-bolts and nuts diagonally from the center outwards in stages,ensuring a smooth,level joint without any steps or looseness.
Level Check:After assembly,re-check the overall level,fine-tune the bottom support,and ensure overall flatness.
III.Tooling and Fixture Assembly(Building Block Style)
Benchmark Planning:Determine the positioning reference surface,clamping points,and welding accessibility according to the workpiece drawings;virtual assembly can be done in CAD first.
Tooling Assembly(From Bottom to Top,From Primary to Secondary)
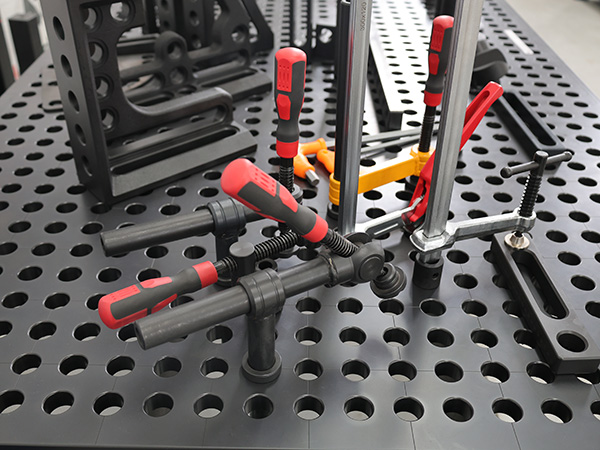
Installing Positioning Elements:Insert positioning blocks,V-blocks,support columns,etc.,into the platform holes and secure them with positioning pins and locking pins to establish a benchmark.
Installing Clamping Elements:Install quick clamps,spiral clamps,toggle clamps,etc.,ensuring uniform clamping force and preventing damage to the workpiece.
Install auxiliary components:Add angle adjusters,telescopic arms,stops,etc.,as needed,and calibrate the position and angle using measuring tools.
Workpiece clamping and verification:Gently place the workpiece onto the fixture,position it according to the reference,and clamp it symmetrically(to prevent deformation).
Recheck dimensions and positions using calipers and dial indicators to ensure compliance with drawing requirements.
IV.Assembly points and precautions:
Precision priority:Use a level and dial indicator to control flatness,levelness,and positioning accuracy throughout the process,ensuring no misalignment at joints.
Tightening specifications:Tighten bolts diagonally in stages to avoid platform deformation caused by excessive force in a single operation.
Protect the platform surface:Use rubber pads for hoisting and fireproof boards for welding;avoid direct arcing on the platform to prevent scratches/burns.
Cleaning and maintenance:Clean iron filings from holes/slots promptly;apply anti-rust oil after completion;return accessories to their proper places.
V.Common problems and solutions:
Steps at joints:Reinstall locating pins,fine-tune the bottom support,and then tighten bolts evenly.
Levelness error:Add/remove shims locally,or fine-tune the bracket bolts,and retest point by point.
Loose clamps:Check if the locking pins/bolts are in place,and replace worn parts.
GB/T 7714:Sharif M M. Integration of 3D Feedback Control Systems forFabrication of Engineered Assemblies for IndustrialConstruction Projects[J]. 2022.
MLA:Sharif, Mohammad-Mahdi. "Integration of 3D FeedbackControl Systems for Fabrication of Engineered Assemblies forIndustrial Construction Projects." (2022).
APA:Sharif, M. M. (2022). Integration of 3D Feedback ControlSystems for Fabrication of Engineered Assemblies forIndustrial Construction Projects.
-
Modular Fixture System for Welding Automation Efficiency
-
3D Flexible Welding Platform Advantages in Fabrication
-
Welding Bench Setup Guide for Workshop Efficiency
-
Steel vs Aluminum Welding Tables: Frame System Comparison
-
Welding Fixture Table Setup Guide for Better Accuracy
-
Why Steel Welding Tables Dominate Industrial Workshops
Hebei Yongxin Measuring Tools
Copyright © 2025-2026 http://www.yx-weldingtable.com. All Rights Reserved Hebei Yongxin Measuring ToolsCopyright